Wood cracks, holes, chipped corners, and rotted sections can make furniture, doors, window frames, decks, and other timber surfaces look worn or unsafe. Replacing the entire piece is not always necessary. In many cases, the right epoxy wood repair kit can restore damaged areas, fill missing material, and create a durable surface for sanding and painting.
Choosing the best epoxy wood repair kit depends on the type of damage, the location of the repair, and the finish you want. A thin epoxy resin may work well for some cracks, while a thicker epoxy wood filler is better for holes, gaps, and missing edges. Wood affected by rot may need a compatible wood consolidant before filler is applied.
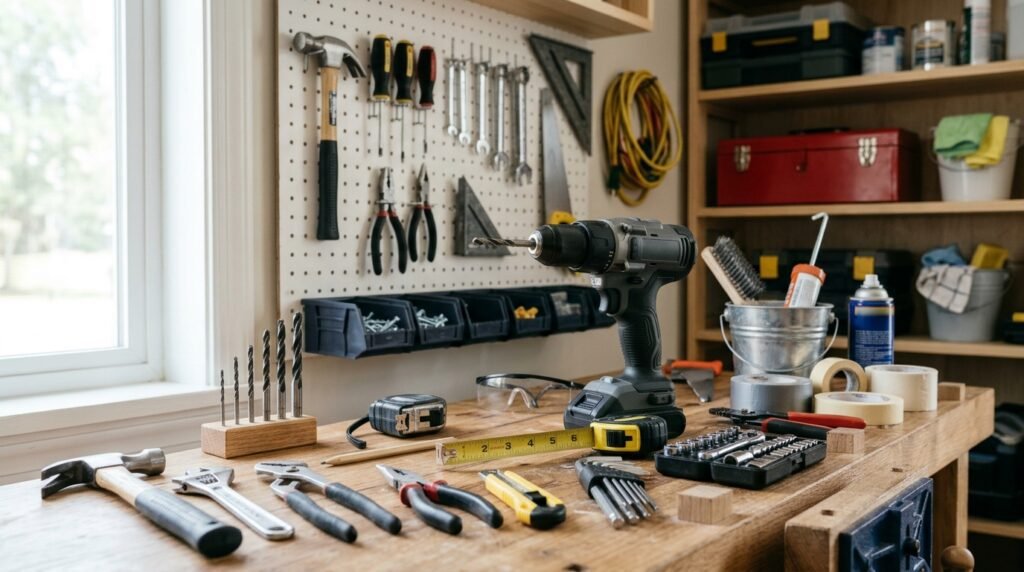
This guide compares common epoxy repair options, explains how to choose a suitable product, and walks you through the repair process. If you are also building a practical home repair toolkit, our guide to the best home maintenance tools explains which basic tools are useful for everyday maintenance projects.
What Is an Epoxy Wood Repair Kit?
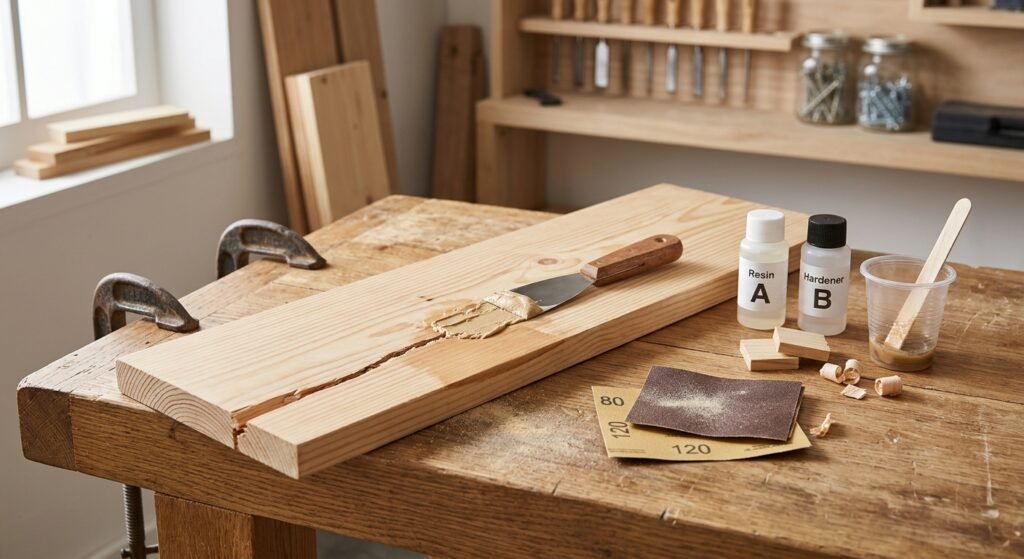
An epoxy wood repair kit typically contains a two-part epoxy system, a ready-to-use epoxy putty, or a combination of products designed to repair damaged timber. Two-part systems usually require mixing a resin with a hardener before application. Once cured, the material can often be sanded, shaped, drilled, or painted, depending on the product specifications.
An epoxy wood filler is commonly used to fill cracks, holes, gaps, and damaged edges. Some products are designed for small cosmetic repairs, while others are formulated for larger repairs or deteriorated exterior timber.
Epoxy is not a universal solution. Deep structural damage, extensive rot, or timber that supports a building may require professional assessment or replacement rather than surface filling.
Common Types of Epoxy Wood Repair Products
| Product type | Best suited for | Main advantage | Important consideration |
|---|---|---|---|
| Two-part epoxy wood filler | Holes, gaps, missing edges | Can create a firm, sandable repair | Must be mixed correctly |
| Epoxy wood putty | Small chips, corners, and local damage | Easy to shape in many applications | Working time varies |
| Low-viscosity epoxy resin | Suitable cracks and voids | Can flow into narrow spaces | May need containment to prevent leakage |
| Wood consolidant | Some deteriorated or porous timber | Helps strengthen suitable remaining wood | Does not replace severely damaged timber |
| Exterior wood repair epoxy | Compatible outdoor timber repairs | Formulated for specified exterior uses | Weather exposure and coating requirements vary |
Always check the manufacturer’s instructions for suitable surfaces, working time, curing conditions, and whether the finished repair is appropriate for indoor or outdoor use.
How to Choose the Best Epoxy Wood Repair Kit
Before buying an epoxy timber repair product, identify the damage and the conditions the repaired wood will face. A product that works well for a small indoor furniture chip may not be suitable for a large outdoor window-frame repair.
Match the Product to the Damage
For narrow cracks, select a product with a consistency and application method suited to the crack’s width and depth. For missing corners, screw holes, or larger cavities, a thicker epoxy filler or putty may be easier to control.
For rotted timber, remove unsound material first. A compatible consolidant and filler system may be appropriate if enough sound wood remains. If the damage affects a load-bearing component, do not assume epoxy alone will restore its structural capacity.
Consider Indoor or Outdoor Use
For exterior repairs, check that the epoxy is specifically suitable for the intended exposure. Sunlight, moisture, temperature changes, and movement in the timber can affect long-term performance. Some repairs also need a suitable primer and protective topcoat.
Check Working and Curing Time
Working time is the period during which the mixed epoxy remains workable. Curing time is the time required for the material to harden sufficiently. These are not always the same.
A fast-curing product can be convenient for small repairs, but a larger or more complex repair may benefit from a longer working time. Follow the product label rather than assuming every epoxy cures at the same rate.
Choosing an Epoxy Wood Filler
| Repair situation | Product feature to look for | What to check before buying |
|---|---|---|
| Fine cracks | Suitable flow or application consistency | Crack depth and risk of leakage |
| Deep holes | Thick, gap-filling formulation | Maximum recommended repair depth |
| Broken corners | Shapeable epoxy putty or filler | Sanding and shaping compatibility |
| Exterior timber | Outdoor-rated repair system | Moisture, UV, and coating requirements |
| Localized wood rot | Compatible consolidant and filler system | How much sound timber remains |
| Painted furniture | Sandable, paint-compatible repair | Primer and finish compatibility |
Ten Useful Products and Supplies for Epoxy Wood Repairs
There is no single product that is best for every repair. The options below are Amazon search links to help you compare available kits and supplies. Review the current listing details, manufacturer instructions, ratings, and suitability before buying.
1. Two-Part Epoxy Wood Repair Kit
A two-part epoxy wood repair kit can be a practical starting point for cracks, holes, and damaged timber. Look for clear mixing instructions, a suitable working time, and a formulation intended for your repair type.
🛒 Shop two-part epoxy wood repair kits on Amazon.
2. Epoxy Wood Filler for Holes and Missing Edges
For deeper holes, gaps, and missing pieces, consider a thicker epoxy wood filler that can hold its shape during application. Check the manufacturer’s recommended maximum repair depth and whether the cured surface can be sanded.
🔎 Find epoxy wood fillers for holes and missing edges on Amazon.
3. Epoxy Wood Putty for Chips and Corners
Epoxy wood putty can be useful for small chips, damaged corners, and localized areas that need shaping. Choose a product that is compatible with the wood and final finish.
⭐ Explore epoxy wood putty options on Amazon.
4. Wood Rot Repair Kit
Where timber has localized rot, a repair kit may combine a consolidant and filler. The correct process generally starts with removing unsound wood and following the kit’s preparation instructions. This approach is not a substitute for replacing severely decayed or structurally compromised timber.
🏠 Find wood rot repair kits on Amazon.
5. Epoxy Wood Consolidant
A consolidant is designed for certain types of deteriorated or porous wood and may be used before a compatible filler. It is most useful when the remaining wood is suitable for repair, not when the timber has lost too much of its integrity.
🔗 Explore wood epoxy consolidants on Amazon.
6. Putty Knife and Filler Application Tools
A putty knife or suitable applicator helps spread filler, press material into a repair, and smooth the surface. Choose a size that fits the damaged area and can be cleaned or disposed of according to the product instructions.
🛒 Shop putty knives and wood filler tools on Amazon.
7. Sandpaper and Sanding Blocks
Once the epoxy has cured as directed, appropriate sandpaper and sanding blocks can help level the repair and prepare it for finishing. The correct grit depends on the product, repair size, and intended coating.
✨ Find assorted sandpaper and sanding blocks on Amazon.
8. Epoxy Mixing Cups and Sticks
Disposable mixing cups and sticks can help you measure and combine two-part epoxy accurately. Follow the manufacturer’s specified ratio and mixing method; do not estimate proportions by eye.
🔎 Explore epoxy mixing cups and sticks on Amazon.
9. Digital Wood Moisture Meter
A wood moisture meter can help you assess whether timber is within the moisture range recommended for a particular repair product. This is especially useful for some exterior repairs, where damp wood can affect adhesion or curing.
🏠 Shop digital wood moisture meters on Amazon.
10. Protective Gloves and Safety Eyewear
Epoxy resin, hardeners, and sanding dust can pose safety risks. Choose protective equipment compatible with the product’s safety instructions. Gloves alone may not provide sufficient protection against every epoxy formulation.
🛒 Find protective gloves and safety eyewear on Amazon.
Affiliate note: These links lead to Amazon US search results, not individually verified product listings. Availability, specifications, prices, and delivery options can change. Readers outside the US should check their local Amazon marketplace or another reputable retailer.
Essential Tools for a Successful Wood Repair
Having the right tools helps you prepare the damaged timber, apply epoxy accurately, and finish the repair cleanly. You do not need every specialist tool for a small project, but surface preparation and accurate mixing are important.
For more practical home projects, our guide to smart home hand tools and precision kits covers useful hand tools for detailed repair and maintenance work.
Tools and Materials Checklist
| Tool or material | Purpose | When it is useful |
|---|---|---|
| Scraper or suitable chisel | Remove loose or damaged wood | Before applying epoxy |
| Putty knife or applicator | Place and shape filler | Cracks, holes, and corners |
| Mixing cup and stick | Mix two-part products | When required by the kit |
| Sandpaper and sanding block | Level cured repairs | Before painting or finishing |
| Cleaning materials | Prepare the surface | As directed by the manufacturer |
| Masking tape or suitable barrier | Control the repair area | Where leakage or spreading is possible |
| Protective gloves and eyewear | Reduce exposure risks | During preparation and application |
| Moisture meter | Assess wood moisture | When moisture requirements matter |
How to Repair Cracks in Wood With Epoxy
Correct preparation is essential for a durable repair. The exact method depends on the epoxy product, the condition of the timber, and the size and location of the damage.
Step 1: Inspect the Damaged Wood
Identify whether the damage is a surface crack, a deep void, a missing corner, or wood rot. Check for moisture, loose material, insect damage, and signs that the wood is part of a load-bearing structure.
If the timber is extensively rotted or structurally compromised, seek professional advice before attempting a cosmetic repair.
Step 2: Remove Loose and Unsound Material
Remove loose splinters, flaking coatings, and deteriorated wood as appropriate. Avoid removing sound material unnecessarily. For rot repairs, follow the selected system’s instructions for preparing the remaining timber.
Step 3: Prepare the Surface
Clean the repair area and allow it to reach the moisture and temperature conditions required by the manufacturer. Some epoxy systems require dry timber; others have different application requirements. Do not assume one rule applies to every product.
Step 4: Mix the Epoxy Correctly
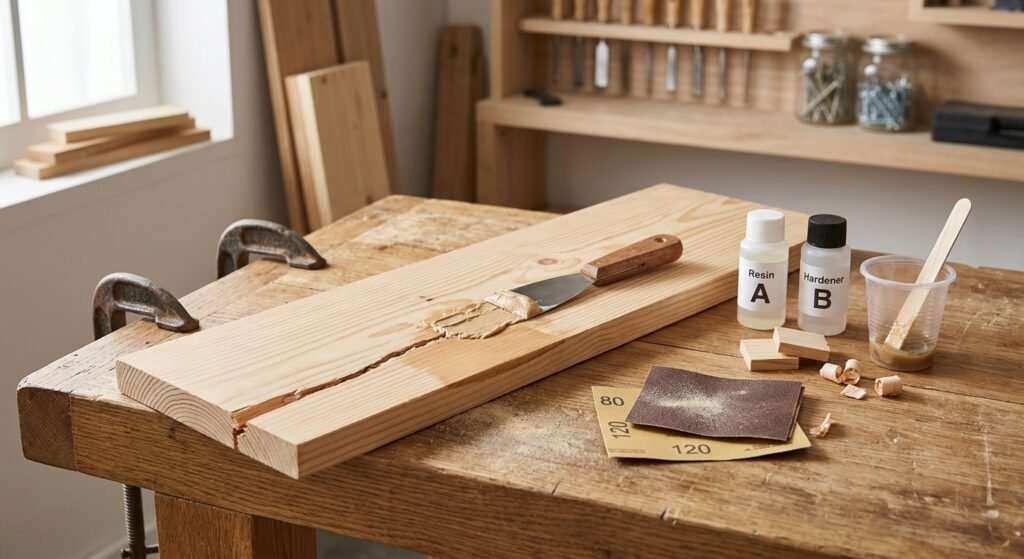
If using a two-part epoxy wood filler, measure the resin and hardener using the specified ratio. Mix thoroughly according to the instructions and prepare only the quantity you can apply within the working time.
Incorrect proportions or incomplete mixing can prevent the product from curing properly.
Step 5: Apply the Filler
Press the epoxy into the prepared crack, hole, or damaged area using the recommended applicator. Work carefully to reduce trapped air and shape the surface as required.
For deeper repairs, check whether the product needs to be applied in multiple layers. Do not exceed the recommended depth or application limits.
Step 6: Allow the Repair to Cure
Leave the epoxy undisturbed for the time and under the conditions specified by the manufacturer. Cooler temperatures may slow curing for some formulations. Avoid sanding or loading the repair before it is ready.
Step 7: Sand and Finish
When the epoxy has cured sufficiently, sand or shape it as directed. Remove dust and apply a compatible primer, paint, stain, or protective coating if recommended. Epoxy and surrounding wood may absorb stain differently, so test the finishing system on an inconspicuous area first.
Wood Repair Process at a Glance
| Stage | What to do | Common mistake to avoid |
|---|---|---|
| Inspection | Identify damage and moisture issues | Filling over active rot |
| Preparation | Remove loose material | Leaving unsound wood underneath |
| Mixing | Follow the specified ratio | Guessing the proportions |
| Application | Fill and shape the repair | Exceeding recommended depth |
| Curing | Follow temperature and timing guidance | Sanding too early |
| Finishing | Sand and coat as suitable | Assuming every epoxy accepts stain |
For more detailed background on epoxy handling and preparation, consult the WEST SYSTEM epoxy basics guide. Always follow the instructions and safety data for the specific product you purchase.
Common Epoxy Wood Repair Problems and How to Avoid Them
Even a suitable epoxy wood repair kit can produce poor results if the timber is not prepared correctly or the material is applied outside its recommended conditions.
Troubleshooting Epoxy Wood Repairs
| Problem | Possible reason | What to do |
|---|---|---|
| Epoxy stays soft or sticky | Incorrect mixing, poor mixing, or unsuitable conditions | Check the instructions and contact the manufacturer if it fails to cure |
| Filler pulls away from wood | Poor preparation or incompatible surface conditions | Remove failed material and prepare the surface as specified |
| Bubbles appear | Air trapped during mixing or application | Use the recommended mixing and application technique |
| Repair cracks again | Wood movement, ongoing moisture, or an unsuitable repair method | Identify the underlying cause before repairing again |
| Finish looks uneven | Different absorption or sanding characteristics | Test compatible primer and finish systems |
| Exterior repair deteriorates | Exposure or coating system is unsuitable | Review exterior suitability and required protection |
Can Epoxy Wood Filler Be Used Outdoors?
Yes, some epoxy wood fillers are designed for exterior repairs, but not every epoxy is suitable for outdoor timber. Confirm the product’s intended use and follow the instructions for surface moisture, temperature, curing, and protective coatings.
Can You Paint or Sand Epoxy Wood Filler?
Many cured epoxy fillers can be sanded and painted, but the exact preparation and compatible finishes depend on the product. Check the manufacturer’s instructions before applying paint, stain, or varnish.
Does Epoxy Repair Wood Rot?
An appropriate repair system may restore some localized areas of deteriorated timber after unsound material has been removed. A compatible consolidant may be used where specified, followed by a suitable filler. Epoxy should not be treated as a universal fix for extensive rot or a substitute for professional structural repairs.
Buying Checklist: What to Check Before You Order
Before choosing a product, compare more than price. A kit that is inexpensive but unsuitable for the damage can waste time and materials.
Epoxy Wood Repair Buying Checklist
| Buying factor | What to look for | Why it matters |
|---|---|---|
| Intended repair | Cracks, holes, edges, or rot | Different damage needs different formulations |
| Indoor or outdoor use | Explicit product suitability | Exposure affects long-term performance |
| Working time | Enough time for your project | Prevents rushed application |
| Cure requirements | Time and temperature guidance | Helps ensure proper hardening |
| Repair depth | Maximum permitted application depth | Reduces the risk of failed repairs |
| Sanding and painting | Compatible finishing options | Important for a clean final appearance |
| Kit contents | Filler, consolidant, tools, or accessories | Helps avoid buying unnecessary extras |
| Safety information | Label and safety data | Supports correct handling and protection |
Which Epoxy Repair Method Is Best for Your Project?
Use the type of damage as your starting point. The best method is the one suited to the timber condition, the repair size, and the environment—not necessarily the product with the most features.
Recommended Approach by Repair Type
| Project | Suitable approach to consider | Key precaution |
|---|---|---|
| Small crack in furniture | Compatible epoxy filler or resin | Check crack depth and finish compatibility |
| Hole in a wooden door | Thick, sandable epoxy wood filler | Follow application-depth limits |
| Chipped table corner | Shapeable epoxy putty or filler | Allow full curing before shaping |
| Localized rot in a window frame | Compatible consolidant-and-filler system | Identify and address moisture entry |
| Exterior timber gap | Exterior-rated repair epoxy | Follow coating and weather-exposure guidance |
| Large or structural timber damage | Professional assessment or replacement where needed | Do not rely on cosmetic filling alone |
Frequently Asked Questions
What is the best epoxy wood repair kit?
The best epoxy wood repair kit is one designed for your specific damage and environment. A two-part filler may suit holes and missing edges, while an appropriate resin or putty may be better for other repairs. For deteriorated timber, check whether a compatible consolidant is required.
What is the best epoxy for wood repair cracks?
The right epoxy depends on the crack’s width, depth, and location. A product that can flow into a narrow crack may be suitable for some repairs, while a thicker filler is generally easier to control in larger gaps. Follow the manufacturer’s application instructions.
Is epoxy wood filler stronger than regular wood filler?
Epoxy fillers can provide durable repairs in suitable applications, but performance depends on the formulation, substrate, preparation, and intended use. Ordinary wood fillers may be more suitable for some small cosmetic repairs. Compare the products’ specifications instead of assuming one is always stronger.
Can epoxy wood filler be used on exterior wood?
Some products are designed for exterior timber repairs. Check their resistance and suitability for the expected moisture, temperature, sunlight, and coating conditions. Correct preparation and maintenance also matter.
Can I stain epoxy wood filler to match natural wood?
Do not assume epoxy will absorb stain in the same way as natural timber. Many repairs are easier to finish with compatible paint or a coating system. Test the proposed finish first if appearance is important.
How long does epoxy wood repair take to cure?
Curing time varies by formulation, temperature, application thickness, and other conditions. Follow the manufacturer’s stated working time, cure time, and instructions for sanding or loading the repair.
Can epoxy fix rotten wood permanently?
No product can guarantee a permanent repair in every situation. Suitable epoxy systems can repair some localized deterioration, but ongoing moisture, extensive rot, or structural damage must be addressed. Severely damaged timber may need replacement.
Final Verdict
The best epoxy wood repair kit depends on the job you need to complete. For cracks and holes, start with a compatible epoxy filler or resin. For chipped corners and missing edges, consider a shapeable putty or thicker filler. For localized wood rot, look for a compatible consolidant-and-filler system and make sure the remaining timber is suitable for repair.
Before ordering, compare the product’s intended use, working time, cure requirements, maximum repair depth, and finishing compatibility. Prepare the wood carefully, follow the manufacturer’s instructions, and use appropriate protective equipment.
Choosing the right product—and preparing the timber correctly—gives you a better chance of achieving a durable, neat repair without replacing more wood than necessary.