
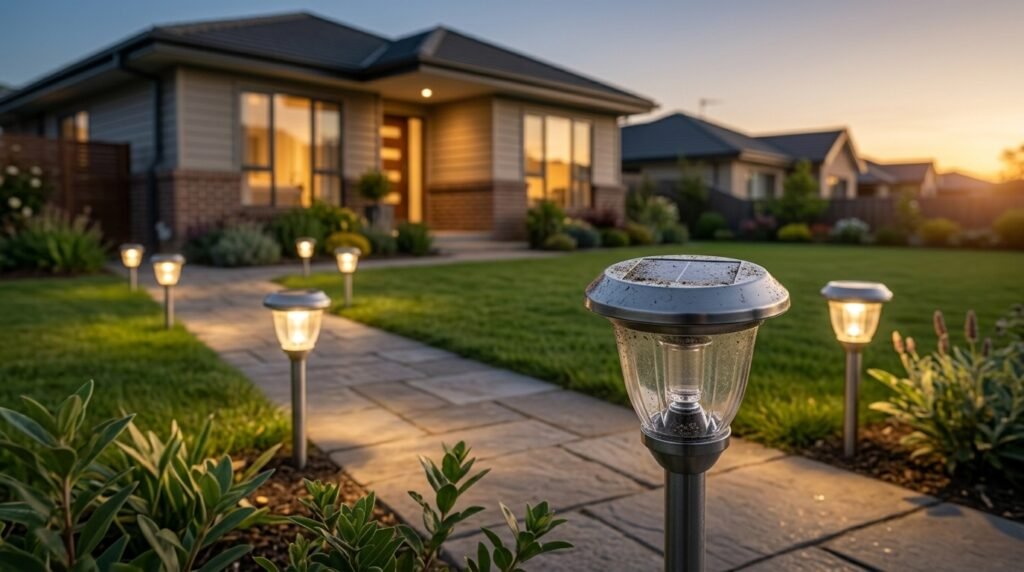
Solar lights are an easy way to illuminate gardens, driveways, patios, pathways, and outdoor entrances without connecting every fixture to household electricity. But what should you do when your solar lights stop working, become dim, flicker, or fail to turn on after sunset?
If your solar lights are not working, you may not need to replace them. The problem could be a switched-off power button, a dirty solar panel, insufficient sunlight, a weak rechargeable battery, or a sensor affected by nearby outdoor lighting. Many of these issues can be checked at home using simple troubleshooting steps.
This guide explains nine common reasons solar lights stop working, how to identify the likely cause, and what you can safely do to fix the problem. You will also learn when replacing the battery makes sense, when a new solar light is a better investment, and how to prevent the same issue from happening again.
Quick answer: Start by checking the ON/OFF switch, removing any protective tab from a new light, cleaning the solar panel, and moving the light into a sunnier location. If it still fails after adequate charging, inspect the rechargeable battery according to the manufacturer’s instructions.
Solar Lights Not Working? Quick Troubleshooting Table
Before taking your light apart, identify the symptom and try the simplest solution first.
| What you notice | Possible cause | What to try first |
|---|---|---|
| Solar light does not turn on at all | Switch off, battery problem, or internal fault | Check the switch and battery compartment |
| Light works briefly and then turns off | Battery cannot hold enough charge | Allow adequate charging; inspect the battery |
| Solar light is dim | Poor sunlight, dirty panel, or aging battery | Clean the panel and improve sun exposure |
| Light flickers at night | Low charge, weak battery, or loose connection | Recharge and inspect accessible connections |
| Light works during the day | Incorrect mode or sensor problem | Check the operating mode and test in darkness |
| Light stopped working after rain | Moisture intrusion or corrosion | Inspect the exterior for damage |
| Solar light fails after winter | Limited charging, cold conditions, or battery deterioration | Clean the panel and follow the manual’s charging instructions |
| Motion sensor light misses movement | Sensor alignment, obstruction, or unsuitable settings | Clean and reposition the sensor |
Not every solar light uses the same battery, switch, or operating mode. Always consult the manual for your specific model before opening the housing or replacing components. If your solar lights are not working, start by checking whether the solar panel receives enough direct sunlight. Next, clean the panel, inspect the rechargeable battery, and make sure nearby artificial lights are not interfering with the dusk-to-dawn sensor. These simple checks can help identify the cause before you replace the light.
Clean the Solar Panel
Dirty panels can reduce the amount of sunlight reaching the solar cells. If your solar lights are not working properly, gently clean the panel with a soft, damp cloth and allow it to dry before testing the light again.
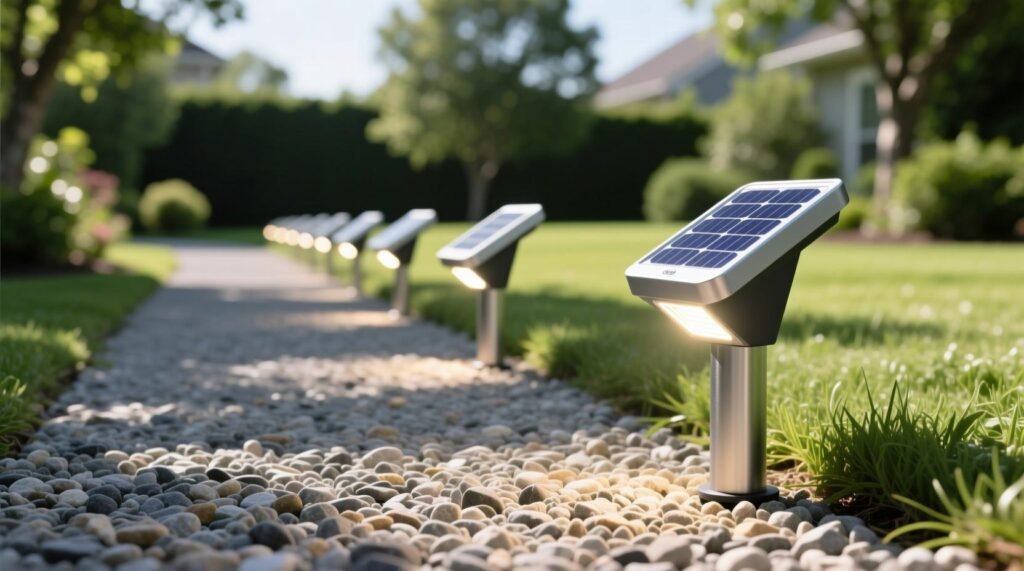
1. The Power Switch Is Off or the Protective Tab Is Still Installed
One of the simplest reasons a new solar light does not work is that its switch is turned off or its battery-protection tab has not been removed.
Some solar lights have a small switch underneath the panel, inside the battery compartment, or on the back of the fixture. Others include several modes, such as ON, OFF, AUTO, or motion-activated operation.
How to fix it
- Locate the power switch and move it to the recommended operating position.
- If the light is new, check the manual for a removable battery-protection tab.
- Remove any protective film covering the solar panel.
- Confirm that the battery compartment is properly closed.
- Place the light in direct sunlight and allow it to charge according to the manufacturer’s instructions.
- Test the light after dark.
Important: Some motion-sensor lights remain dim or off until they detect movement. That behavior may be normal rather than a fault.
If your solar light is brand new and has never worked, check these basic settings before purchasing replacement batteries or another fixture.
2. The Solar Panel Is Dirty
Solar panels need exposure to daylight to recharge their batteries. Dust, pollen, bird droppings, leaves, and other debris can block sunlight and reduce charging performance.
This is particularly common with garden lights installed near trees, flower beds, roads, or dusty outdoor areas.
How to clean a solar light panel
- Turn the light off if the manufacturer’s instructions recommend doing so.
- Gently wipe the panel with a soft, damp microfiber cloth.
- If necessary, use a small amount of mild soap compatible with the fixture.
- Remove soap residue with a clean, damp cloth.
- Dry the panel gently and check for cracks or cloudy damage.
- Return the light to a sunny location.
Avoid abrasive scrubbers, harsh chemicals, and high-pressure water. These can damage the panel, seals, or protective coating.
If you need a suitable cleaning cloth, you can 🛍️ Shop microfiber cleaning cloths on Amazon.
Routine cleaning is a simple maintenance step that may restore charging when dirt is the problem. It will not, however, repair a damaged panel or a battery that has reached the end of its useful life.
3. Your Solar Lights Are Not Getting Enough Sunlight
A solar light can appear defective when its panel simply does not receive enough sunlight to recharge the battery.
Shadows from buildings, fences, trees, roof overhangs, and other outdoor fixtures can limit charging. The sun’s position also changes throughout the year, so a location that receives good sunlight in summer may become shaded in winter.
How to improve sunlight exposure
- Move portable solar lights to a sunnier position.
- Trim vegetation only where it is safe and appropriate.
- Check whether the panel is shaded during the middle of the day.
- For lights with separate panels, reposition the panel according to the installation manual.
- Allow extra charging time after several cloudy days.
There is no single sunlight requirement for every model. The necessary exposure depends on the panel size, battery capacity, weather, and how much energy the light uses at night.
| Installation location | Potential problem | Recommended action |
|---|---|---|
| Under a porch roof | Limited direct sunlight | Relocate the panel to a sunnier position |
| Beneath a tree | Shade changes during the day | Check the sunniest available location |
| Beside a tall fence | Long periods of shade | Move the fixture away from the fence |
| North-facing or enclosed corner | Limited seasonal sunlight | Test a more exposed location |
| Open garden or yard | Usually better exposure, depending on orientation | Keep the panel clean and unobstructed |
| Separate panel attached to a wall | Panel angle or position may be unsuitable | Adjust according to the product manual |
If you want to upgrade an area with poor sunlight, compare fixtures with separate solar panels and longer connecting cables. Check the cable length and compatibility before buying.
You can 🔎 Find solar lights with separate panels on Amazon.
For larger solar photovoltaic systems, the U.S. Department of Energy also explains why maintenance, debris management, and system performance monitoring matter in its solar photovoltaic operations and maintenance guidance.
4. The Rechargeable Battery Is Weak or Worn Out
If your solar lights worked well for a season or two but now turn off shortly after sunset, the rechargeable battery may no longer hold enough energy.
A solar light stores the electricity generated during the day in a battery. At night, that stored energy powers the LED. As the battery ages, its usable capacity can decrease.
Common signs of a failing battery
- The light becomes dimmer than it used to be.
- It switches off after a short time.
- It performs better after a particularly sunny day but fails again.
- Cleaning the panel and improving sunlight exposure do not solve the problem.
- The battery shows damage, leakage, or corrosion around its compartment.
Battery life varies according to chemistry, temperature, charging conditions, and product quality. Do not assume every battery needs replacing after a fixed number of months.
How to replace a solar light battery
- Turn off the light and bring it to a dry work area if the design permits.
- Read the manufacturer’s instructions and open only the intended battery compartment.
- Record the battery type, voltage, size, chemistry, and capacity.
- Check the compartment for moisture or corrosion.
- Purchase a compatible rechargeable replacement.
- Insert it with the correct polarity.
- Close the compartment and allow the light to recharge as directed.
Never replace a rechargeable battery with a standard alkaline battery for normal solar-light operation. Alkaline batteries are not designed to be recharged and may leak or damage the light.
| Battery detail | What to check before buying |
|---|---|
| Size | AA, AAA, or the specific size required by the fixture |
| Voltage | Match the original battery specification |
| Chemistry | Match the manufacturer’s approved battery type |
| Capacity | Choose a compatible rating within the manufacturer’s requirements |
| Rechargeability | The replacement must be designed for repeated charging |
| Physical fit | Confirm dimensions and connector compatibility |
| Condition | Do not reuse leaking, swollen, or damaged batteries |
For compatible models that use AA batteries, you can 🛒 Check rechargeable AA NiMH batteries on Amazon.
For models that use AAA batteries, ⭐ Explore rechargeable AAA NiMH batteries on Amazon.
Do not buy a replacement based only on its size. The battery chemistry and electrical specifications must also be compatible.
5. Nearby Lights Are Confusing the Light Sensor
Most dusk-to-dawn solar lights use a light sensor to determine when the surroundings become dark enough for the LED to turn on.
A bright porch lamp, streetlight, security light, or another fixture shining directly onto the sensor can sometimes prevent the solar light from activating at night.
How to fix a sensor problem
- Check whether a nearby light shines directly onto the solar light’s sensor or panel.
- Temporarily eliminate that source of light if it is safe and practical.
- Move the solar fixture if necessary.
- Test the light in darkness according to the manual.
- If the light still fails, check its mode, battery, and sensor condition.
Some fixtures have separate sensors, while others integrate the sensor into the solar panel or housing. Their behavior can differ.
If you need a replacement for a damaged or unsuitable fixture, compare outdoor solar wall lights designed for dusk-to-dawn operation.
🏠 Find dusk-to-dawn solar wall lights on Amazon.
Do not cover or modify a sensor permanently to force the light to remain on. Doing so may interfere with normal operation and drain the battery.
6. Water Has Entered the Solar Light
Outdoor solar lights are exposed to rain, humidity, temperature changes, and sometimes irrigation water. A weather-resistant rating does not mean a fixture is suitable for submersion or that its seals can never fail.
Moisture inside the housing can cause corrosion, intermittent operation, or damage to electronic components.
Signs of moisture damage
- Water droplets or condensation inside the housing
- Green, white, or rust-colored corrosion on accessible metal contacts
- Cracked plastic or damaged seals
- A light that stopped working after heavy rain
- A battery compartment that remains wet
What should you do?
Turn the light off and stop using it if water has reached the battery or electrical components. Follow the manufacturer’s instructions for inspection and drying. Do not charge, operate, or dismantle a damaged lithium battery.
If the fixture is designed to have a user-accessible battery compartment, inspect the seal only after the unit is safely switched off. Replace damaged seals or components only with approved parts.
Do not open sealed electronics or attempt circuit-board repairs unless you have the appropriate skills and the manufacturer permits the repair. Replace the fixture or seek qualified assistance if water damage has affected inaccessible electronics.
For a replacement, compare ✨ outdoor solar flood lights with weather-resistance ratings. Check the stated IP rating, installation requirements, and warranty rather than relying on the phrase “waterproof” alone.
7. The Light Is Flickering or Turning Off Too Early
Flickering and short run times usually point to a charging, battery, connection, or sensor issue. The exact cause depends on when the problem occurs.
| Symptom | Likely explanation | First step |
|---|---|---|
| Flickers soon after sunset | Battery has insufficient charge | Allow more charging time |
| Turns off after an hour or two | Battery capacity may have deteriorated | Check battery compatibility and condition |
| Flickers when moved | A loose connection may be present | Inspect accessible connectors with the light off |
| Works only after sunny days | Charging is limited by shade or weather | Improve panel exposure |
| Motion light flashes or changes brightness | Normal operating mode or motion setting | Review the manual |
| Flickers after rain | Moisture or corrosion may be present | Stop using it if water has entered the housing |
Try these steps
- Clean the panel and move the light to a sunnier position.
- Confirm the operating mode and allow the recommended charging period.
- Inspect accessible battery contacts and connectors for damage.
- Replace a worn battery only with a compatible type.
- If the problem continues, check the warranty or consider replacing the fixture.
Do not bypass the battery-management circuit, bridge contacts, or connect an unknown battery directly to the panel. These actions can damage the equipment and create a safety risk.
8. Cold Weather or Several Cloudy Days Have Reduced Charging
Solar lights depend on available daylight. Extended cloudy weather, shade, snow, and seasonal changes can reduce the amount of energy collected during the day.
Cold temperatures can also affect battery performance, while extreme heat may accelerate battery aging. The effects depend on the battery chemistry and the manufacturer’s design limits.
How to improve performance during winter
- Remove snow, leaves, and debris from the panel when it is safe to do so.
- Check whether the panel receives more sunlight at a different seasonal angle.
- Allow the light to recharge over the period recommended by the manufacturer.
- Use the low-brightness or motion-activated mode if the fixture offers one.
- Store removable fixtures indoors if the manufacturer recommends winter storage.
- Never leave a damaged battery or wet electronic component in service.
If the lights are working less consistently in winter, do not immediately assume they are broken. First determine whether the panel is receiving enough daylight to support the expected night-time runtime.
For outdoor pathways or driveways where dependable lighting is important, compare solar fixtures with a larger panel and a suitable battery capacity. A motion-activated model may conserve energy when continuous full brightness is unnecessary.
🔗 See solar motion sensor lights on Amazon.
9. The Solar Panel, Sensor, LED, or Internal Circuit Has Failed
If you have checked the switch, panel cleanliness, sunlight, battery, and operating mode, a failed component may be responsible.
Possible problems include:
- A cracked or severely damaged solar panel
- A failed light sensor
- Corroded internal connections
- A damaged LED or circuit board
- A broken cable on a fixture with a separate solar panel
- A failed battery-management component
Should you repair or replace the light?
| Condition | Repair or replacement decision |
|---|---|
| Dirty panel or incorrect setting | Clean or adjust the light |
| Compatible replaceable battery is worn out | Replace the battery |
| Loose external connector | Reconnect only as instructed by the manufacturer |
| Damaged cable or replaceable panel | Check approved replacement parts and warranty |
| Cracked housing with moisture inside | Replace if safe, approved repair is not practical |
| Failed sealed electronics | Replacement is often more practical |
| Fixture is under warranty | Contact the manufacturer before opening it |
For simple pathway lighting, a replacement set may be more economical than repairing a sealed fixture. For a more expensive floodlight or wall light, check whether the manufacturer sells a compatible battery or solar panel first.
You can 🛍️ Shop solar pathway lights on Amazon or 🔎 Find solar spotlights for gardens and landscaping.
If you want decorative lighting rather than a pathway or security fixture, ✨ Explore outdoor solar string lights.
For installations where the panel and lamp are separate, a compatible replacement panel may also be worth investigating.
🛒 Check replacement solar panels for outdoor lights. Confirm connector type, voltage, wattage, and compatibility with the original fixture before ordering.
Inspect the Rechargeable Battery
If your solar lights are not working even after a full day of charging, inspect the rechargeable battery according to the manufacturer’s instructions. An old or damaged battery may need replacement with a compatible type.
How to Test Solar Lights at Home
A controlled test helps you distinguish a charging problem from a sensor or battery issue.
Simple testing procedure
- Check the switch: Confirm the fixture is set to its intended operating mode.
- Clean the panel: Remove dirt and visible debris.
- Inspect the installation: Make sure the panel is not shaded.
- Charge the light: Allow the manufacturer’s recommended charging period in suitable sunlight.
- Test after dark: Place the fixture in a genuinely dark location, away from other bright lights.
- Observe the result: Note whether it stays on, flickers, or turns off early.
- Inspect the battery: If the light remains unreliable, check the battery specification and condition according to the manual.
Do not assume that every light should switch on immediately when you cover its panel. Some products have delays, motion-only settings, or specific testing procedures.
| Test result | What it suggests | Next action |
|---|---|---|
| Works after cleaning | Dirt was likely limiting charging | Add panel cleaning to routine maintenance |
| Works after moving into sunlight | Original location received insufficient light | Keep it in the improved location |
| Works after charging but fades quickly | Battery may have reduced capacity | Inspect the battery |
| Works in darkness but not outdoors at night | Nearby lighting may affect the sensor | Change the location or remove the interference |
| Still dead after basic checks | Component failure is possible | Check the warranty or replace the fixture |
For basic maintenance, a small screwdriver set may help with user-accessible battery compartments, provided the manual permits opening them. ⭐ Explore precision screwdriver sets on Amazon.
How to Prevent Solar Lights from Stopping Working Again
Preventive maintenance can help your solar lights charge properly and make it easier to identify problems early.
| Maintenance task | Suggested approach | Why it helps |
|---|---|---|
| Clean the solar panel | Check monthly and whenever visibly dirty | Helps sunlight reach the panel |
| Check for shade | Reassess when seasons or vegetation change | Improves charging opportunities |
| Inspect the housing | Look for cracks and damaged seals | Helps identify moisture risks |
| Check the battery | Follow the manual and watch for shorter runtime | Helps detect battery deterioration |
| Remove leaves and snow | Clear the panel when safe | Reduces obstructions |
| Review the operating mode | Check after installation or accidental setting changes | Prevents confusion about normal behavior |
| Store seasonal lights correctly | Follow manufacturer instructions | Protects the fixture during extended storage |
If your wider goal is reducing household energy use, SmartAirHQ’s guide to how to reduce electricity consumption offers additional ideas. You can also explore our Lighting & Electrical category for more home lighting and electrical guides.
Check Sunlight Exposure
One common reason for solar lights not working is insufficient sunlight. Place outdoor solar lights where their panels receive several hours of direct sunlight during the day. Trees, walls, roofs, and other obstructions can reduce charging performance.
Frequently Asked Questions
Why are my solar lights not working even after a sunny day?
The battery may not be charging properly, the panel may be dirty or partially shaded, or the light may be switched off. Check the operating mode, clean the panel, and verify that the light receives unobstructed sunlight. If it still fails, inspect the battery and follow the manufacturer’s testing procedure.
Why do solar lights work for only a few hours?
A worn battery is one possible cause, but insufficient charging can produce similar symptoms. Check whether the panel receives enough sunlight and whether the light is operating in a high-brightness or motion mode. If performance remains poor, inspect the battery specifications.
Can I replace the batteries in solar lights?
Some solar lights have replaceable batteries, while others use sealed battery packs. Consult the manual before opening the fixture. Match the specified battery size, voltage, chemistry, and other requirements. Never substitute a non-rechargeable alkaline battery for a rechargeable battery in normal operation.
Should I leave solar lights switched on all day?
Follow the instructions for your model. Many solar lights are designed to remain in AUTO or ON mode so they can charge during daylight and illuminate when the sensor detects darkness. Other products require a particular mode during initial charging or storage.
Do solar lights work on cloudy days?
Yes, many solar lights can charge in cloudy conditions, but charging may be reduced. If several cloudy days occur in succession, the battery may not store enough energy to support the usual night-time runtime.
Why do my solar lights turn on during the day?
The sensor may be dirty or faulty, the operating mode may be incorrect, or the light may use a different activation method. Review the manual and test the fixture in a dark environment before assuming it has failed.
Can rain permanently damage solar lights?
Weather-resistant lights are designed for particular outdoor conditions, but damaged seals, cracked housings, and unsuitable exposure can allow water inside. If moisture reaches the battery or electronics, switch the fixture off and follow the manufacturer’s safety guidance.
How long do solar light batteries last?
Battery life varies with chemistry, quality, temperature, charging cycles, and use. Rather than relying on a universal replacement schedule, watch for declining brightness or shorter runtime and follow the manufacturer’s recommendations.
Is it better to repair or replace a solar light?
Cleaning and repositioning are worth trying first because they require little expense. Battery replacement may also be worthwhile when the battery is designed to be replaced. If sealed electronics have failed or the housing is badly damaged, replacement may be more practical.
Final Thoughts: Get Your Solar Lights Working Again
If your solar lights are not working, you may not need to replace them immediately. In many cases, the problem comes from a dirty solar panel, insufficient sunlight, a depleted rechargeable battery, or interference with the light sensor.
Start by cleaning the solar panel and moving the light to a location that receives several hours of direct sunlight. Check the switch, charging time, battery condition, and nearby artificial light sources. If the light still does not work, consult the manufacturer’s instructions before replacing the battery or the entire unit.
For longer-term energy savings around your home, explore our guide to smart energy-saving devices for home. Choosing, positioning, and maintaining solar lights properly can help you get more reliable outdoor lighting with less wasted effort.
The bottom line: Diagnose the simple problems first, and replace parts only when necessary. A few basic checks may be all you need to get your outdoor solar lights shining again.
SmartAirHQ tip: Bookmark this guide so you can use the troubleshooting tables the next time your garden, pathway, or security lights stop working.
Affiliate Disclosure
SmartAirHQ may earn a commission when you purchase through qualifying Amazon links in this article, at no additional cost to you. Recommendations should be based on compatibility, suitability, and the reader’s needs. Product availability, specifications, and prices can change, so confirm the details on the retailer’s page before buying.